Prototyping · Study deck
Hardware Prototyping: Board and Breadboard Bring-Up
Firmware is code stored on the board.
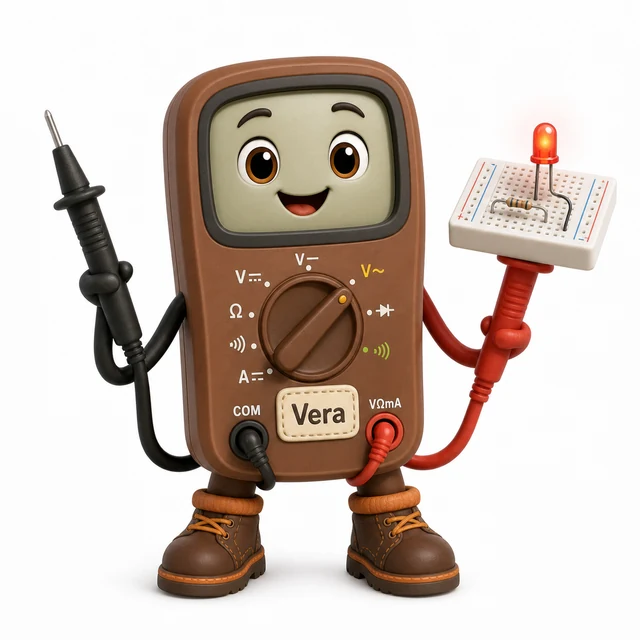
Voltage Vera is your guide for this deck.
After studying this chapter
Learning objectives
You will be able to:
- Bring up the development board and record pass criteria for power, USB, code loading, and one output.
- Save a working baseline before adding the external circuit; verify it can be restored after a failed change.
- test bring up the development board with a concrete scenario and pass criteria
- validate 4. forgetting the working baseline with a concrete scenario and pass criteria
Major section
Bring Up the Development Board
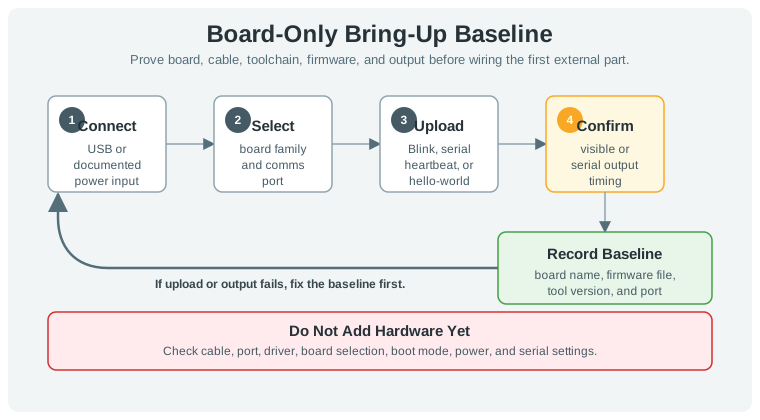
The first firmware test should be boring.
- Its job is to prove the development chain, not the final application.
- That closed loop gives every later component experiment a known starting state.
- If this step fails, do not add hardware yet.
- For Linux or Android-style single-board computers, GPIO access is also an operating-system boundary.
Major section
Bring Up the Development Board (continued)
IR and PIR should be recorded as sensing mechanisms, not vague "motion" claims.
- Those names are useful only after the record says which physical header, voltage domain, connector, storage path, or radio path the prototype actually uses.
- Programmatic GPIO access adds a second evidence layer.
- SDK, UI, and GUI should be recorded as software or user-facing boundaries.
Major section
Build the First Breadboard Circuit
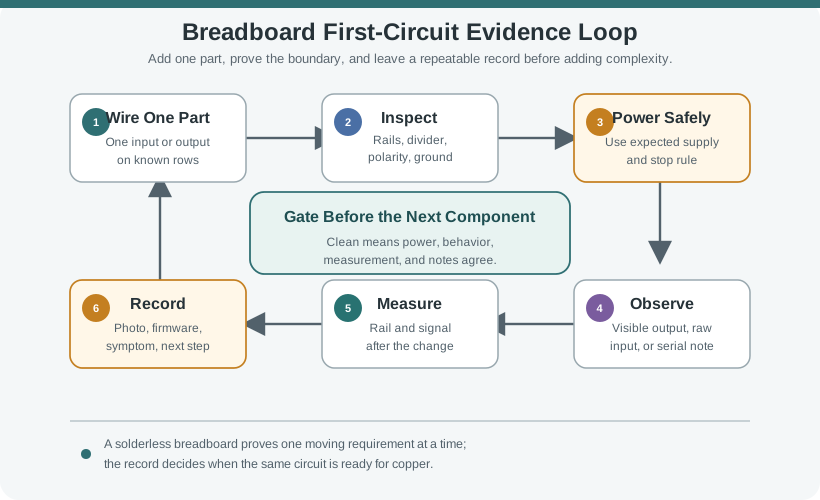
After the board-only test works, add one simple output or input.
- In Figure: This solderless breadboard's central gap keeps the two, look first at the central trench: it separates the two terminal-strip halves and lets an integrated circuit straddle unconnected rows.
- That hidden metal pattern is part of the schematic.
- A small indicator output is a good first check because it makes timing and pin control visible.
- A solderless breadboard is a cheap, modular circuit board for mockups and tests.
Major section
Build the First Breadboard Circuit (continued)
A breadboard amplifier usually needs fewer tools, less time, and less experience, and it is easy to change resistor values, swap the op-amp channel, or move the signal path while the requirement is still moving.
- Mapping it before power preserves the chapter's core discipline of knowing exactly which boundary changed.
- Recording the result closes the loop before another component is introduced.
- This prevents a later failure from erasing the last known working state.

Major section
Debug the First Failure
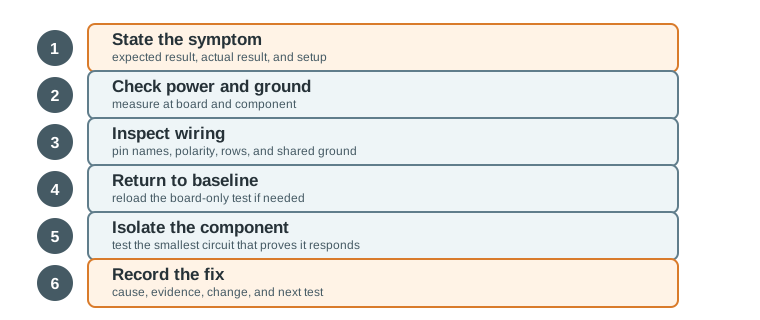
Most first-build failures are not mysterious.
- The final record turns the fix into evidence and adds a regression case to the next build, completing the experiment rather than merely making the symptom disappear.
- Climb the First-build debugging ladder diagram from the exact symptom rather than from a guessed cause.
Major section
Worked Scenario: First Room Monitor
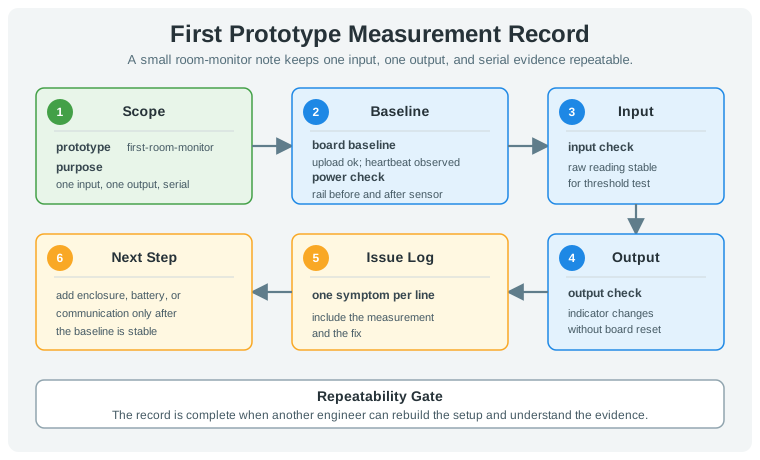
The first project is a small room monitor with one environmental sensor and one indicator output.
- The goal is not a finished product.
- The goal is to prove the board, power, input reading, output control, and record habit.
- Input proof: The sensor is wired alone, detected or read, and produces a stable raw value.
Major section
Worked Scenario: First Room Monitor (continued)
The issue log preserves failed observations and their fixes, while the next-step field prevents enclosure, battery, or network work from beginning on an unstable baseline.
- Output proof: The indicator output changes state under firmware control without disturbing the board rail.
- The worked room monitor is complete only when its separate proofs can be reconstructed.
- The record is the durable endpoint of the chapter's one-change-at-a-time narrative.
Deck summary
Key takeaways
The first firmware test should be boring.
- IR and PIR should be recorded as sensing mechanisms, not vague "motion" claims.
- After the board-only test works, add one simple output or input.
- A breadboard amplifier usually needs fewer tools, less time, and less experience, and it is easy to change resistor values, swap the op-amp channel, or move the signal path while the requirement is still moving.
- Most first-build failures are not mysterious.
Retrieval practice
Recall check 1 of 2

Voltage Vera says: answer from memory, then check your reasoning.
Q1Per this chapter's small-amplifier example, what is the tradeoff between prototyping on a breadboard versus moving straight to a PCB or perfboard build?
Show answer
Answer: A The chapter states: 'A breadboard amplifier usually needs fewer tools, less time, and less experience.
Retrieval practice
Recall check 2 of 2

Voltage Vera says: answer from memory, then check your reasoning.
Q2You have uploaded a known-good board test, and now want to connect the first external sensor. What should happen before power is applied again?
Show answer
Answer: B The first external component should pass a simple compatibility and wiring inspection before power returns.
Print reference
Answers
Answer key.
- A · A PCB or perfboard amplifier is smaller, tidier, and more repeatable, but it costs more setup time and freezes mistakes in pinout, rail choice, feedback wiring, and part placement.
- B · The first external component should pass a simple compatibility and wiring inspection before power returns.