ADXL345 Evidence Practice
ADXL345 Evidence Practice
Choose ADXL345 Evidence
For each claim, choose one datasheet row and one bench check:
- The tag wakes only on meaningful movement during warehouse handling.
- The device can detect tilt changes without clipping during installation.
- The MCU can sleep while the accelerometer buffers samples.
The route turns a product need into evidence in a deliberate order. Start with the application claim, select the datasheet rows that constrain it, and choose an interface and firmware configuration that can meet those constraints. Bench measurements then show whether the assembled board behaves as expected; the release record ties those results to conditions and remaining risks. If a later check fails, return to the stage that supplied the assumption rather than treating the part feature as proof.
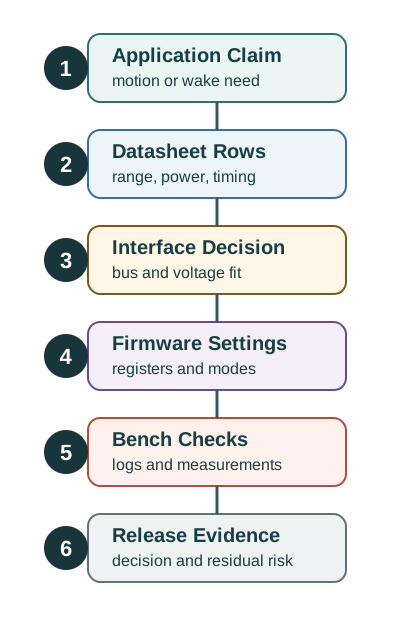
Use the six numbered stages in Figure 1 to trace how a claim becomes a defensible decision. The first stages define the application and select relevant datasheet rows; the middle stages translate those limits into interface and firmware settings. The final stages require bench evidence and a release record. Follow the arrows to see that evidence moves forward, while a failed measurement can send the reviewer back to revise an earlier assumption. Range, power, and timing therefore belong at different points in one linked chain, not in an isolated feature checklist.
Practice Checks
These checks ask you to connect a datasheet row to the design decision it supports. Use the evidence path, rather than a feature name alone, to choose an answer.